Validating Your Adobe Analytics Data
Do you fully understand your Adobe / SiteCatalyst / Omniture reports? How do you know if the data in the reports is valid or accurate? Do you ever get asked if the data is correct and how do you go about proving its accuracy?
Today I am going to walk you through a set of steps that can help you verify the accuracy of any dimension, metric, or segment you use in Adobe Analytics. These same steps can be also used to help you better understand the reports and the data they show. In most cases this approach allows for the data verification to happen in practically real time.
The basic idea is very simple - what if you were able to generate some activity on a website that Adobe Analytics is tracking and check the reports for the data that you, yourself have generated.
As an example you can enter a sample order for $50.00 and see if the revenue you generated is correctly reported as 1 order for $50 for product X. Another example is clicking on a particular outbound link and verifying that the Site Content/Links/Exit Links report is getting correctly updated with the exact outbound link. Or entering a keyword on your site’s internal search engine and checking that the internal search keyword dimension is updating properly with the search term you used.
Here are three steps you can use to validate your own activity in Adobe Analytics:
Step 1 — Generating the activity on the site
- Clear the cookies in your browser
- Type the starting URL for your testing scenario and append the query parameter: “case"
- Give the “case" parameter an unique value that is specific to the test you are running. If there are multiple people running such tests you could add your initials for easier case identification.
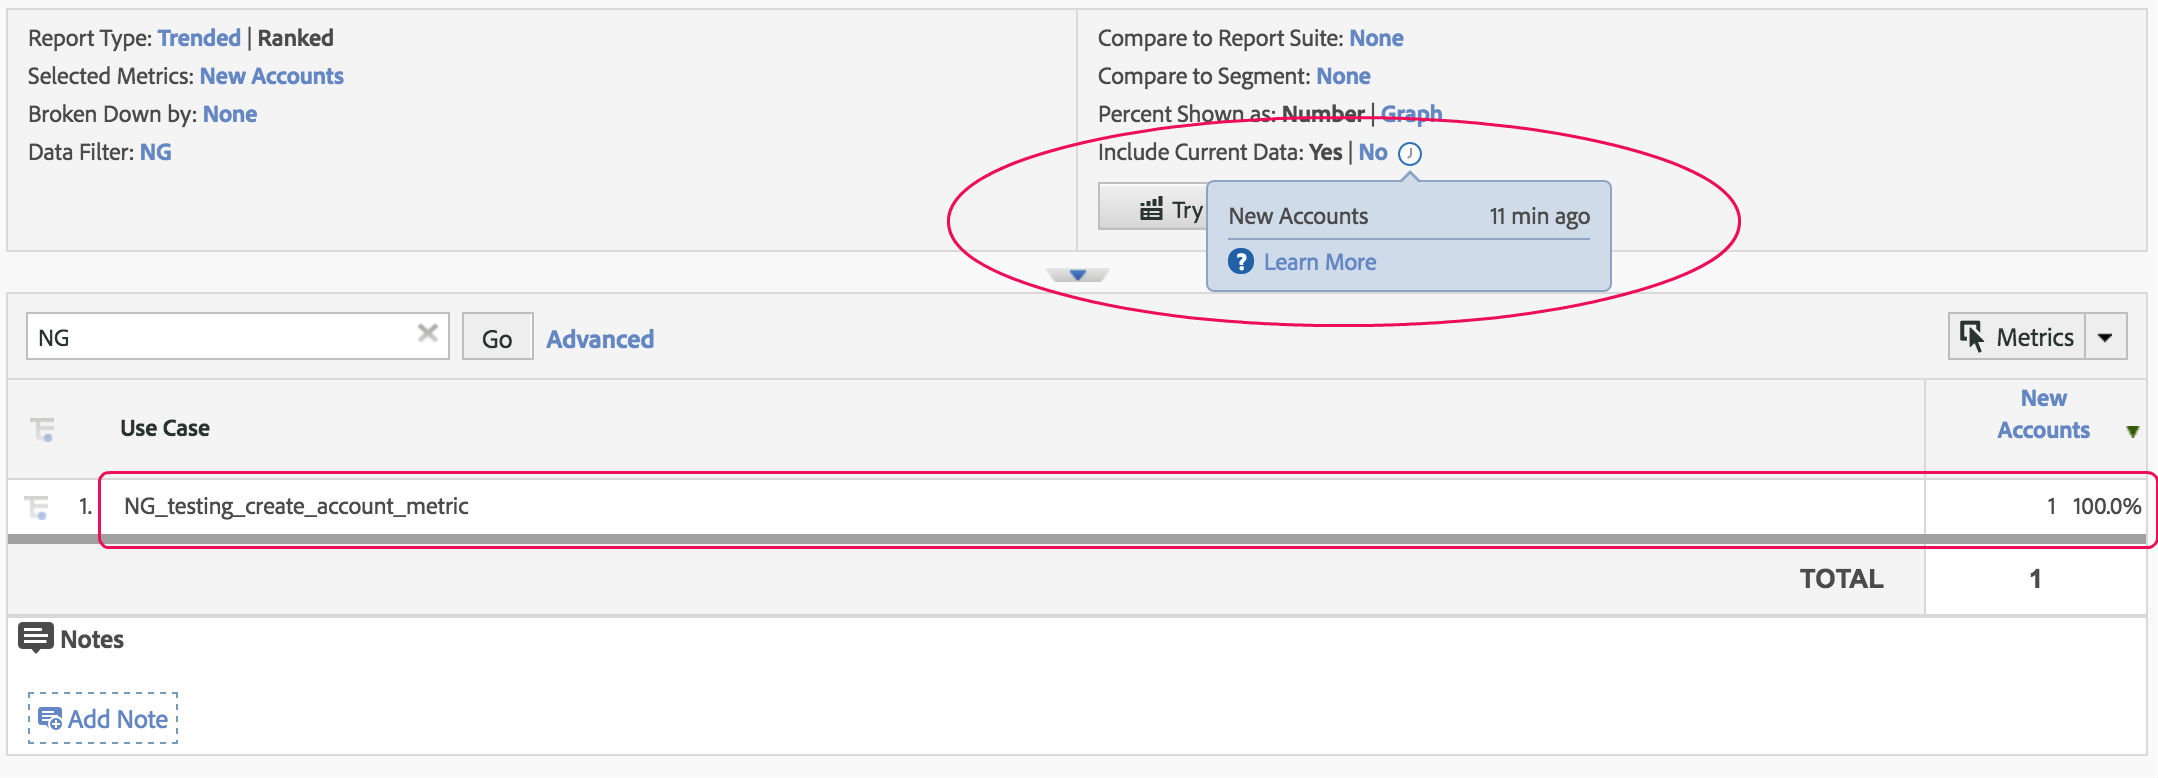
- To give you an example - if I was trying to validate that the “New Accounts” metric on www.qa2l.com is being captured correctly, I would start my test by typing the following: https://www.qa2l.com/?case=NG_testing_create_account_metric
- The value of the case parameter is up to you and you can setup your own structure for how you name your tests. The “case" parameter name itself is also somewhat arbitrary, you can use a different name, just make sure you reflect the parameter name correctly in step 2.2 below.
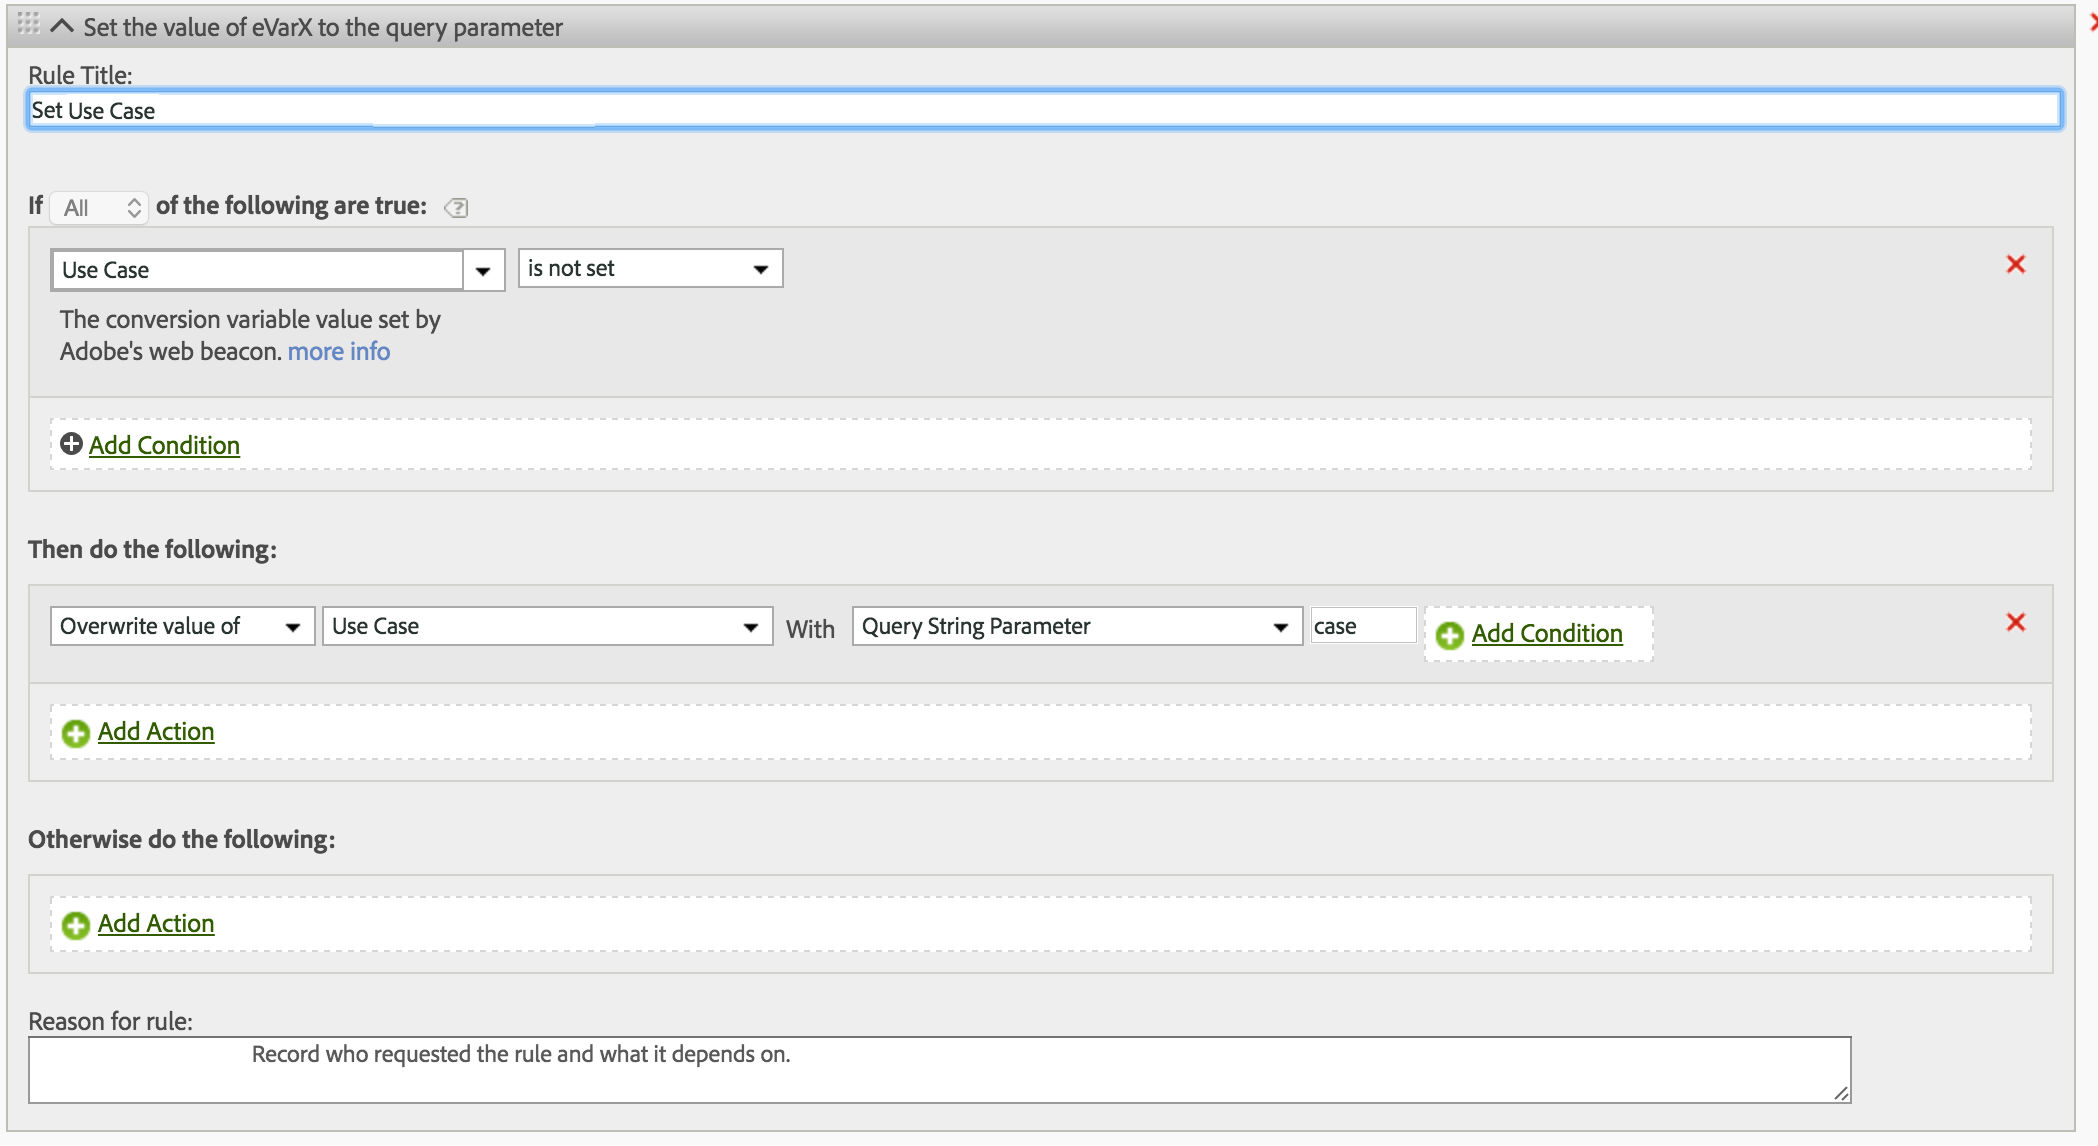
Step 2 - Setting up Adobe Analytics
1. Find an available eVar. Enable this eVarX with the following settings (also see screenshot):
- Name: Use Case (you can name your dimension differently if you'd like)
- Allocation: Most Recent (Last)
- Expire After: Visit

2. Create a processing rule using the following settings (also see screenshot):
- Condition: Use Case is not set
- Action: Overwrite value of: Use Case with Query String Parameter: case
Step 3 - Checking your reports
- If you are trying to check a metric - use your Test Case dimension together with the success metric in question. Be sure to check that you have selected the current day in the calendar and also select “Include Current Data”. You will see your Test Case dimension values populate within a few minutes of your test.
- You can also use the values in the Test Case dimension to break out the specific testing scenarios by another dimension or include them in a segment. For such checks you won’t be able to use Current Data and will have to wait until the data for your web session is fully loaded in Adobe which in my experience is often complete in less than an hour.
This 3-step approach requires minimal setup and can be universally applied for practically any dimension (prop or eVar), success metric, or segment. It will help you validate your data and use it with confidence.
This approach can be the starting point towards ongoing automation and validation of data quality. The same sequence of steps performed on the website can be recorded within a QA2L flow task and automatically executed on a schedule. Combined with the alerts generated by QA2L, this approach can help with establishing good data discipline and improve report quality.
|
|
About QA2L |
|
QA2L is a data governance platform specializing in the automated validation of tracking tags/pixels. We focus on making it easy to automate even the most complicated user journeys / flows and to QA all your KPIs in a robust set of tests that is a breeze to maintain.
|
|
Tags: Adobe Analytics Tips